1. ADD AN IMAGE
Once your items have been created, either using the auction manager or the item upload template, you will want to make sure each item has an image. Below are the steps to add images:
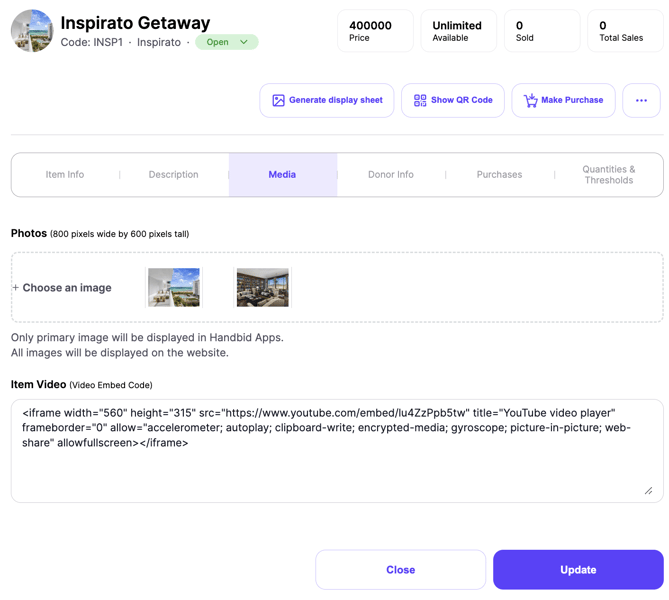
- Select an item
- Select the MEDIA tab in the edit item window
- Select the blue Choose an Image button
- Your image must be 800x600 pixels (very important for best viewing on app)
- Select your image by dragging and dropping your image in the window or by selecting an image directly from your desktop, camera, Facebook, Google drive, Dropbox, Instagram, Fickr, etc
- Select the Update button to save your image.
2. REMOVE AN IMAGE
- In the left-hand menu in your Auction Dashboard, click the Items dropdown, select ALL, then click on the item in the item list.
- Once you click on the item and the detail window appears, click on the Media tab.
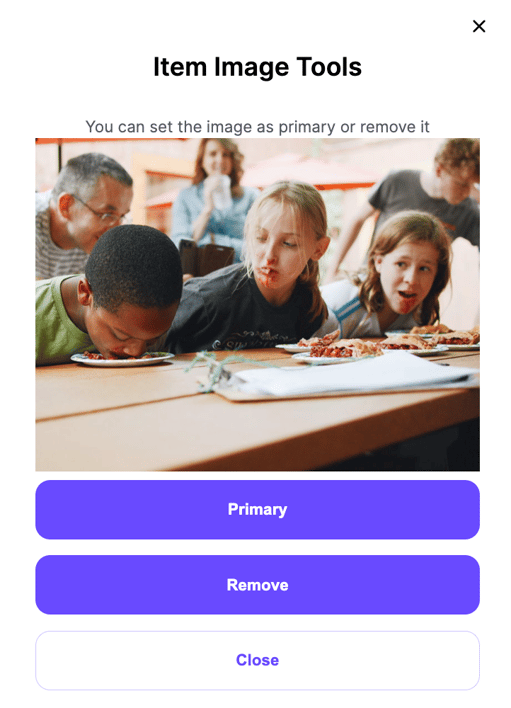
- To remove an image, click on the image thumbnail. When you click the thumbnail a pop-up window will appear. This is where you can either set that image as the primary image or remove the image (see image below).
- Click the Remove button.