Article Index:
Getting Setup
The guest list is a powerful tool that will not only allow you to register guests, it will also track who is in attendance and who is not. Before we get started, there are a few principles related to the guest list that we want to make sure are clear:
1. Load every possible guest into the list.
The guest list is meant to be a comprehensive list of who is coming to your event. What that means is that every possible seat at a table should be listed in your guest list. If you have a sponsor who purchased a table of 8 and only gave you 6 names, you would still want to add in 2 additional slots for them in the guest list. So that list may look like this when you create it:

2. Not everyone is going to bid!
Most couples would prefer to bid together, so be sure and anticipate this during registration. When you check-in a couple, ask which one of them will be the bidder of the group and register that one person (and not both of them).
Check-in from a desktop:
Instructions:
From the guest list find the person you wish to register. You can filter the guest by the sponsor or the table. You can also search for them by name by typing into the search box at the top. When you search for the name, you can search by first name or last name. DO NOT type in both. Once you find the guest, click on their name.
In the screenshot below, the list has been filtered by the sponsor. From this list, you can see all guests registered under that sponsor. There is one that has been loaded as a generic "guest" for this sponsor. This is the one we will edit.
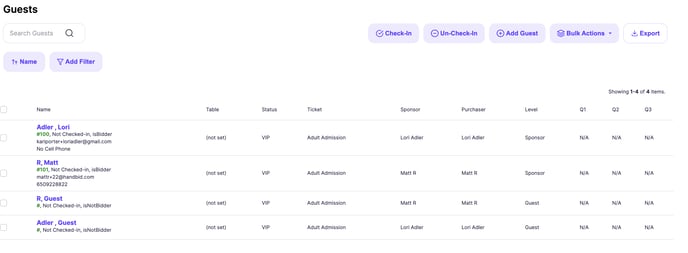
Next, click on the square next to the guest's name. You will then click on the "Check-In" button to check them in and register them as a bidder. If they are going to be a bidder, click on the bidder box next to their name.

On the next screen, you can confirm their information, make sure the "Country Code" is right for their cell phone, and then hit the "Register" button to assign a Paddle ID to the guest and add them to the auction.

Registering a Party from the Guest List (multiple guests)
The most common way to use the guest list for checkin is to checkin a party that arrives. To do this, you would follow these steps:
- Ask the group if they are all arriving together as a party. For couples, this may be more obvious; but, for larger groups, you may have to qualify your question a bit. Questions like "are you all at the same table or with the same group" are ways to identify a group that may want to register together. You certainly don't have to check in large parties and some may prefer to split up to other checkin lines. Either way is fine!
- If you are checking in a big party (more than a couple) you may want to look them up by their sponsor (assuming they are coming together). Then you can select them all in the list and start the checkin process.
- Once you have your list, you can select their names and start the checkin process.
- After you have selected the guests, click the Check-in & Register button to begin the check-in process.
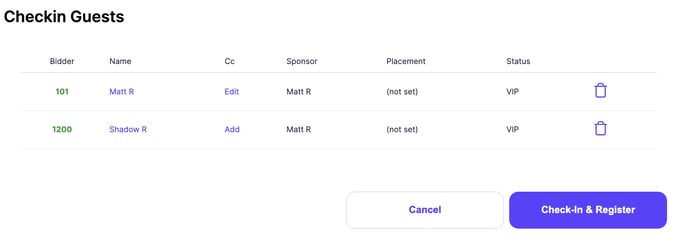
- As you go through the list, you will have the option to "Register" them as a bidder or just check them in. To register them as a bidder, you simply click on the box in the "BIDDER" column.
-
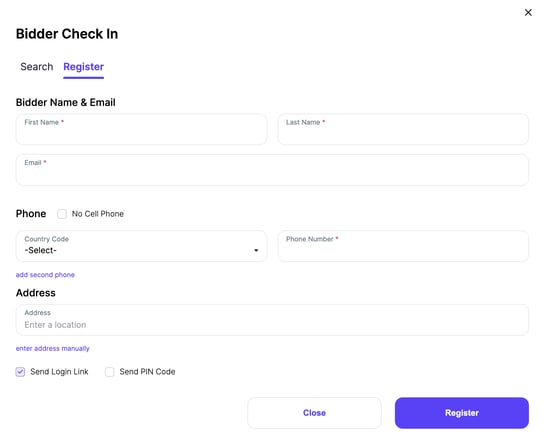
When registering as a bidder, you will need to capture the user's email address and phone number.
Once you have registered the bidder, the next screen will display the Bidder's Paddle Number. You will need to tell the bidder this number if they are bidding from iPads; and/or you will need to hand the bidder a card with this number on it if you intend to do a paddle raise appeal or a live auction.
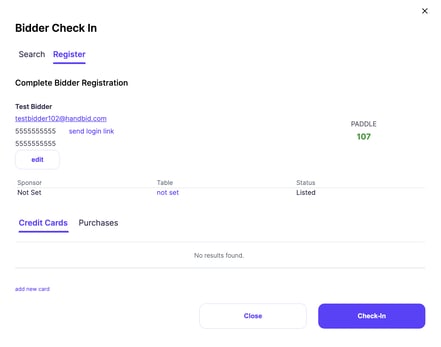
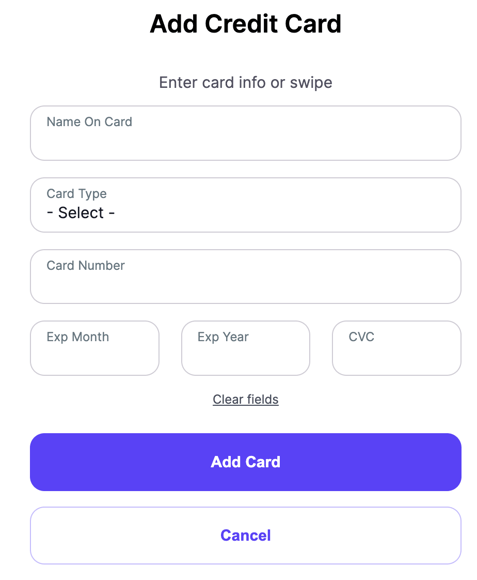
On this same screen, you can capture a credit card from the bidder to put on their account. Simply click on the "credit cards" tab next to purchases. Once you are done with each guest, the system will close out and you can check in the next party.
You can also add a purchase from the bidder check in screen.
Printable Volunteer Instructions
Click HERE for a PDF of volunteer instructions you can print.