Integrate Handbid Data into your Live Stream Software (OBS example)
By Using streaming software, like OBS, you can easily incorporate Handbid information that is updated in real time. Read this article to learn how it's done!
Most streaming software allows you to incorporate a browser source into your scenes. These browser sources can be a web page or URL that will then load in data and display it.
In this article, we will explain what web overlays Handbid offers and how to incorporate those into OBS, an open-source (and quite powerful) streaming software platform.
Before we get started, you first need to make sure you plan to use streaming software. Tools like Zoom Conferencing or direct webcams are not going to be able to effectively use these overlays. Instead, if you plan to use Zoom, you may just want to consider displaying live Handbid TV dashboards instead. To learn more about Handbid TV, review this article: Handbid TV Overview
Step 1 - Create your Scenes in OBS
(or streaming software of your choice)
In OBS, you will create a series of scenes, these will be predefined layouts where you will incorporate a number of elements (graphics, logos, images) and sources (video feeds, camera sources, web pages).
Handbid provides four different overlays, so we will create 4 different scenes in our example here:
1. Scene: Live Auction
Camera source showing a live auctioneer on the screen along with the item detail for the currently promoted item in Handbid. (What is a promoted item? Read here on how to promote items into the live stream).
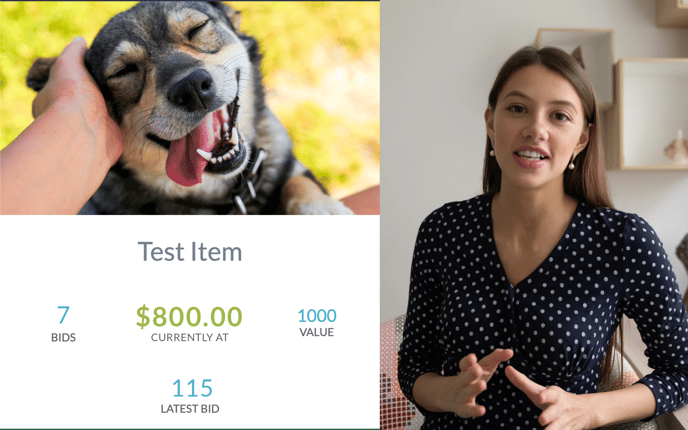
2. Scene: Live Appeal (Ask)
Camera source showing a live auctioneer or emcee on the screen along with a thermometer below the individual. The thermometer will show live donations as they come in along with the user's information and the updated thermometer amount.
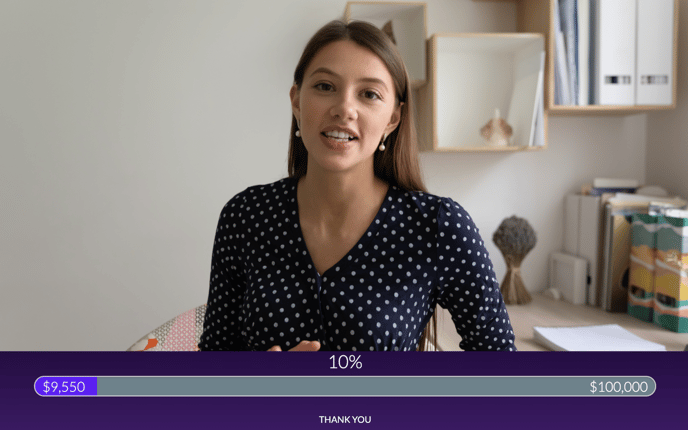
3. Scene: Auction Activity
Camera source showing a live auctioneer or emcee on the screen along with a lower-thirds overlay at the bottom (or anywhere you want to display it) showing live (updated) bidding activity.
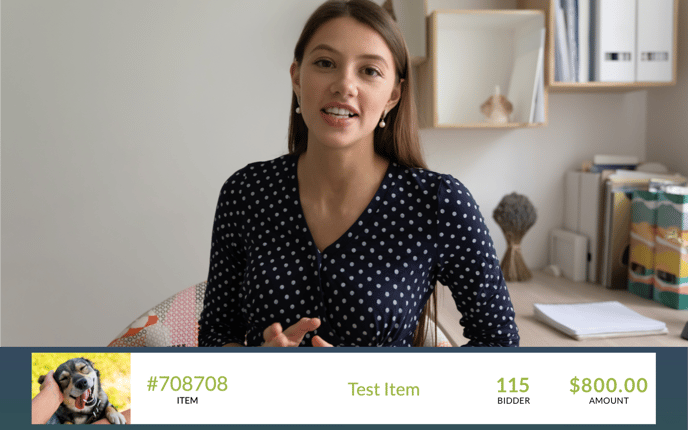
4. Total Goals
This will show your total amount raised currently compared to the total amount of your goals.
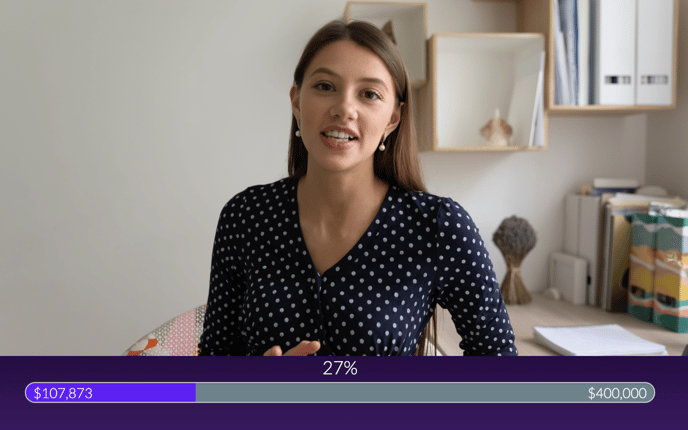
Step 2 - Adding in Handbid to the Scene
You will complete the following for each of your scenes:
1. Name the Scene
Our first step is to name the scene and then add our sources.
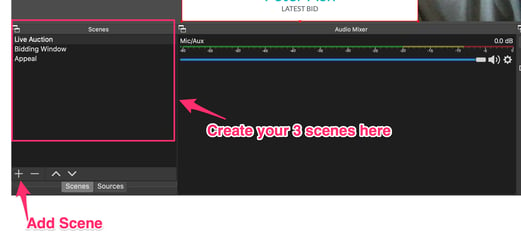
2. Add Video Source
For testing purposes, we will simply add a webcam source as our live camera source and fill the screen with this source.
3. Add Overlay Source
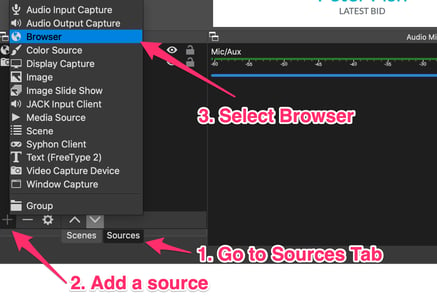
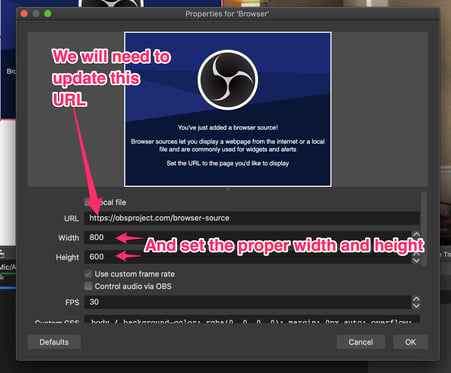
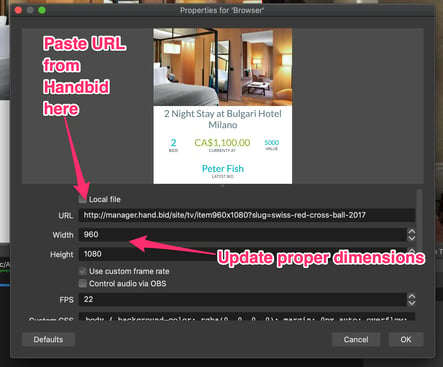
Next, we will add another source which will be our promoted item overlay. In OBS, to add this source click on "Add Source: Browser Source". Name this source anything you wish and save it. Next click on it to edit its parameters. What we need to insert here is the URL from Handbid for your event. We will also need to set the correct dimensions for it so that it formats correctly.
The following screenshots will show you where to find these settings in OBS:
4. Find Source URL in Handbid
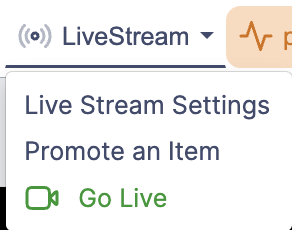
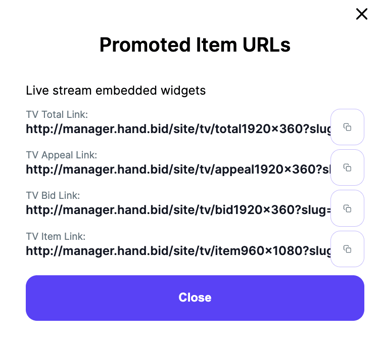
Ok, so where do we find these source URLs in Handbid? They are under the Promote Item settings In the Handbid Live Stream. To get them, you will want to go to your event in Handbid, click on Live Stream, and then "Promote Item":
5. Can't Find URL? Promote Something
Next, if you do not have any item promoted, promote something to generate the URLs. Just promote an item and save. When you return to the Promote Item settings, you will now see the URLs that you need. We try to make it easy on you and provide a button you can click to copy the URL.
6. Live Auction Scene Display
For our Live Auction scene, we want to display the "Item" overlay which is the 3rd one on the list here. So click on the third one if you are following along and then paste this into the OBS settings for this Browser Source:
7. Dimensions
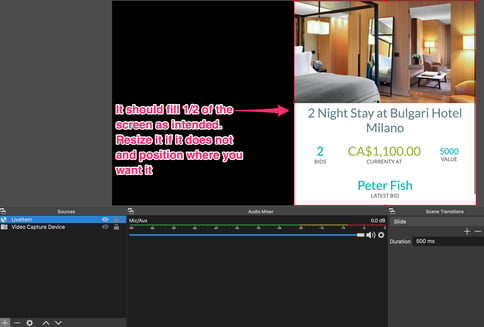
Where it may get tricky for you is getting the dimensions right. To do that you will need to understand the layout of the video stream. The default is 1920x1080 meaning you will have 1920 pixels of width and 1080 high. To have this item take up 1/2 of the screen vertically (which it was designed to do), then you will want to have it be full height: 1080 and half of the width: 960
If you do this right and save it, it should appear on the screen correctly:
8. Next Steps
The next steps are to create your other sources for the thermometer and the auction activity ticker. Follow the same steps:
-
- Add the browser source and name it accordingly (e.g. Thermometer)
- Go to Handbid and retrieve the URL for it from Promote Items settings (the URL with "appeal" in it is the thermometer and the one with "bid" in it is for the thermometer)
- Paste in those URLs into the browser source and set the dimensions as such: 1920 wide and (1/3 tall or 360 high)
- Save those and then incorporate those sources into your scenes (add the Thermometer to your Appeals Scene and the Bid Activity to an "Auction Activity" scene)
Step 3 - Test the overlays!
The last step is to test this, so promote a test item (one you are fine to delete bids on) and also make sure you have at least one appeal item setup in Handbid.
Watch the OBS screen (or broadcast it to YouTube if you want) and confirm that your bidding activity and donations appear. Also on the Live screen, confirm the data updates as you bid on that item (you may want to test this with multiple bidders).
This Still Doesn't Make Sense...
Seem too complicated? Well if video streaming software is not your thing, it could be. We would recommend you either consult a professional who knows streaming software like OBS, learn streaming software on your own, or consider Handbid's Auction in a Box bundled solution where we set all of this up for you.